Difference between revisions of "Building an inexpensive paddle strop quickly"
(→Building the strop) |
(→Building the strop) |
||
| Line 6: | Line 6: | ||
<gallery perrow="2" heights="250px" widths="400px" caption=" "> | <gallery perrow="2" heights="250px" widths="400px" caption=" "> | ||
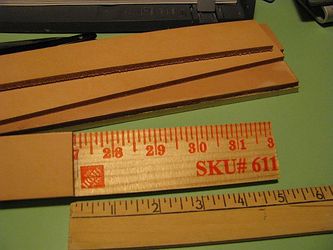
Image:Building Quick and Inexpensive Paddle Strops - 001.jpg|This is what you get. It isn't fancy but it works like a champ, so don't laugh. It features a 16-inch long light, wooden paddle and a 1.5-inch by 11-inch leather stropping surface. That is generous compared to many commercial travel-style paddle strops. | Image:Building Quick and Inexpensive Paddle Strops - 001.jpg|This is what you get. It isn't fancy but it works like a champ, so don't laugh. It features a 16-inch long light, wooden paddle and a 1.5-inch by 11-inch leather stropping surface. That is generous compared to many commercial travel-style paddle strops. | ||
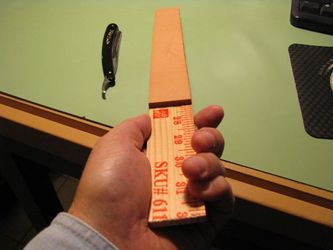
| − | Image:Building Quick and Inexpensive Paddle Strops - 002.jpg|The secret for making this easy is to find leather strips and wood paddle stock that | + | Image:Building Quick and Inexpensive Paddle Strops - 002.jpg|The secret for making this easy is to find leather strips and wood paddle stock that are already at the proper width. Here are some possible material for 1.5-inch wide wood paddles. The top piece is a paint stirring stick available for free at paint shops. The middle piece is a heavy-duty yardstick available for 60 cents each at HomeDepot. The bottom piece is a poplar trim strip available for about $3. These are all about 1/4 inch thick except the trim strip was a little thicker. |
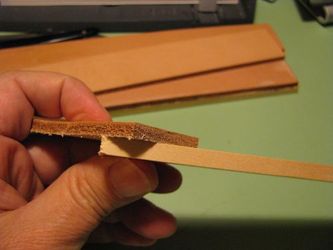
Image:Building Quick and Inexpensive Paddle Strops - 003.jpg|A look at the end grain. Top to bottom is the paint stick, the yardstick, and the poplar trim strip. The yardstick has a nice, tight grain pattern and looks quarter-sawn. Thus, it should be less likely to warp than the other two and give a nice stable surface for mounting the leather. This yardstick is much heavier than typical ones. Also, when you look for these, sort through the barrel to find a few with the best end-grain. | Image:Building Quick and Inexpensive Paddle Strops - 003.jpg|A look at the end grain. Top to bottom is the paint stick, the yardstick, and the poplar trim strip. The yardstick has a nice, tight grain pattern and looks quarter-sawn. Thus, it should be less likely to warp than the other two and give a nice stable surface for mounting the leather. This yardstick is much heavier than typical ones. Also, when you look for these, sort through the barrel to find a few with the best end-grain. | ||
Image:Building Quick and Inexpensive Paddle Strops - 004.jpg|These yardsticks seemed to have a thin wash coat finish. It isn't much but it is better than nothing. This saves you from getting into a messy and involved painting or finishing process. The numbers and hash marks on the yardsticks are ingraved or pressed into the wood, but that did not seem to bother the leather surface when it was applied. | Image:Building Quick and Inexpensive Paddle Strops - 004.jpg|These yardsticks seemed to have a thin wash coat finish. It isn't much but it is better than nothing. This saves you from getting into a messy and involved painting or finishing process. The numbers and hash marks on the yardsticks are ingraved or pressed into the wood, but that did not seem to bother the leather surface when it was applied. | ||
Revision as of 12:53, 20 January 2010
There are several styles of really nice paddle strops available at vendor sites, however they tend to be a little expensive. I wanted to experiment with different stropping pastes, so I decided to make a set of my own paddles based on a very quick and easy design. I made six of these for less than $30, so that works out to less than $5 each. I was able to build them in a day with just a few tools (a saw and a knife). If you don't need six and don't want to spend $30, then go by a leather shop and dig through the scraps. You might find enough for one or more of these for zip.
Building the strop
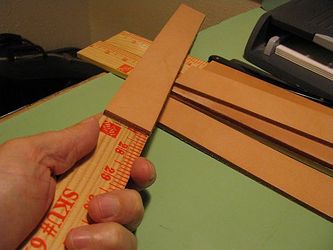
This is what you get. It isn't fancy but it works like a champ, so don't laugh. It features a 16-inch long light, wooden paddle and a 1.5-inch by 11-inch leather stropping surface. That is generous compared to many commercial travel-style paddle strops.
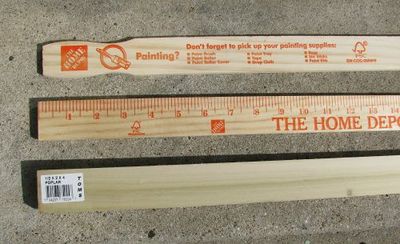
The secret for making this easy is to find leather strips and wood paddle stock that are already at the proper width. Here are some possible material for 1.5-inch wide wood paddles. The top piece is a paint stirring stick available for free at paint shops. The middle piece is a heavy-duty yardstick available for 60 cents each at HomeDepot. The bottom piece is a poplar trim strip available for about $3. These are all about 1/4 inch thick except the trim strip was a little thicker.
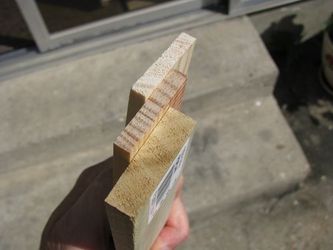
A look at the end grain. Top to bottom is the paint stick, the yardstick, and the poplar trim strip. The yardstick has a nice, tight grain pattern and looks quarter-sawn. Thus, it should be less likely to warp than the other two and give a nice stable surface for mounting the leather. This yardstick is much heavier than typical ones. Also, when you look for these, sort through the barrel to find a few with the best end-grain.
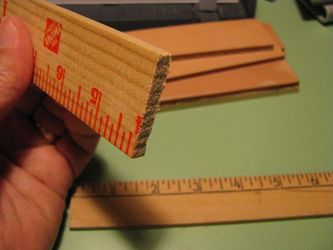
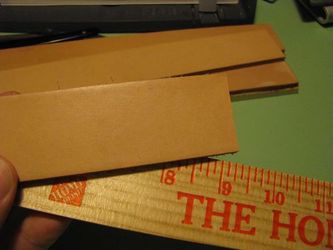
These yardsticks seemed to have a thin wash coat finish. It isn't much but it is better than nothing. This saves you from getting into a messy and involved painting or finishing process. The numbers and hash marks on the yardsticks are ingraved or pressed into the wood, but that did not seem to bother the leather surface when it was applied.
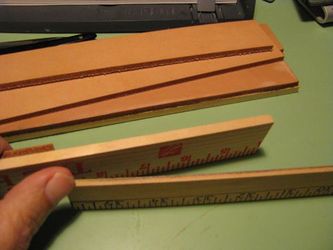
A more standard style yardstick is shown here so you can see the comparison with the one used from HomeDepot. A standard style yardstick is too flexible and too narrow for 1.5-inch wide leather.
The leather is a 1.5-inch by 72-inch cowhide strip from Tandy. This cost me about $16 on sale. Mark the leather into 11-inch pieces and cut with a sharp knife. Cut the yardsticks into 16-inch pieces with a saw.
This cowhide leather seems nice and solid. Tandy has latigo leather strips in the same size for a few dollars more. Check the latigo closely for bumps on the surface that would require culling some of the strip.

This is the contact cement that all the forum guides suggest for paddle strops. It works great. Spread it on both surfaces. Let it dry, and then carefully place the leather onto the paddle in the correct position and squeeze. I didn't need to use clamps. The most likely screw-up in this whole process is getting glue all over eveything. Don't get it on the top side of the leather!
The paddle is 16 inches and the leather is 11 inches, so that gives a 5-inch grip. That should work fine for average sized hands.
That's it. Have fun. Watch the video below to see the test flight.
- You can use this strop as-is for daily stropping, or you can experiment with different stropping pastes on each paddle. Also, the leather surface can be lightly sanded to change the texture to one that will hold pastes better.


