Difference between revisions of "Easily make a pasted balsa strop"
m (recategorizing) |
|||
| Line 12: | Line 12: | ||
</gallery> | </gallery> | ||
| + | '''The Slartibartfast Pasted Strop''' | ||
| + | |||
| + | Materials needed: | ||
| + | Some type of solid backer, i cut a piece of 12x12 tile i had laying around. | ||
| + | Balsa: You can find this at most hobby stores. | ||
| + | Some kind of glue | ||
| + | Clamps or something heavy to set on top once everything is glued down. | ||
| + | |||
| + | <gallery Caption:"Making The Slartibartfast Pasted Strop" widths="300px" heights="180px" perrow="2"> | ||
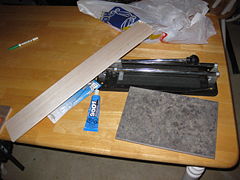
| + | Materials I used: | ||
| + | Image:Pasted_balsa_strop_by_slart_001.JPG | ||
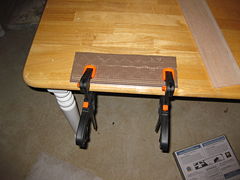
| + | I use clamps, a heavy object will work too once you glue to 2 pieces together | ||
| + | Image:Pasted_balsa_strop_by_slart_002.JPG | ||
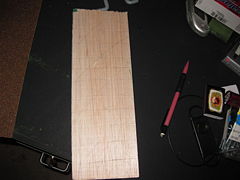
| + | Make a Grid on the balsa so you can lap it flat. | ||
| + | Image:Pasted_balsa_strop_by_slart_003.JPG | ||
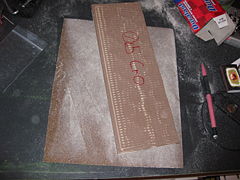
| + | Use a figure 8 or x-pattern until the marks are gone. You may want to wipe down the balsa with a damp towel afterward. | ||
| + | Image:Pasted_balsa_strop_by_slart_004.JPG | ||
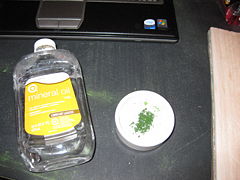
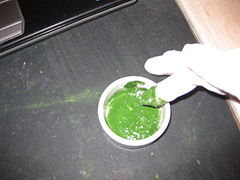
| + | Mix the Chromium Oxide powder with some mineral oil | ||
| + | Image:Pasted_balsa_strop_by_slart_005.JPG | ||
| + | Much Easier to spread now | ||
| + | Image:Pasted_balsa_strop_by_slart_006.JPG | ||
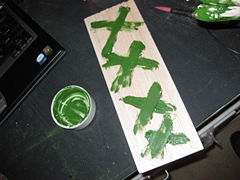
| + | Draw an X pattern and then spread | ||
| + | Image:Pasted_balsa_strop_by_slart_007.JPG | ||
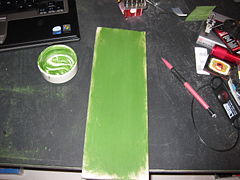
| + | What it looks like spread out. Note: this may be a little thick.... | ||
| + | Image:Pasted_balsa_strop_by_slart_008.JPG | ||
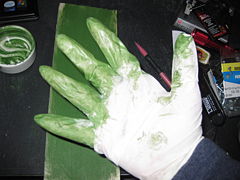
| + | Why I wear gloves when applying CrO | ||
| + | Image:Pasted_balsa_strop_by_slart_009.JPG | ||
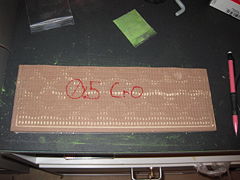
| + | Mark your pasted strop to avoid confusion later | ||
| + | Image:Slart_Strop10.JPG | ||
| + | |||
| + | </gallery> | ||
== References == | == References == | ||
Revision as of 22:58, 13 March 2009
Originally posted by backpackerx.[1]
Just finished making a homemade balsa strop and thought I'd post here since it's so easy. I did this because I'm a newbie who has blown the budget for a while and can't buy one and also because it's so dead easy that even I, who have zero craftsman abilities, could do. Hopefully I can figure out how to get the pictures to post on here.
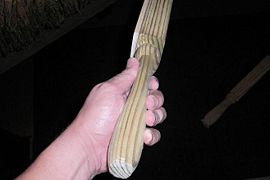
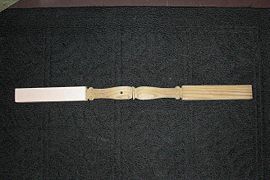
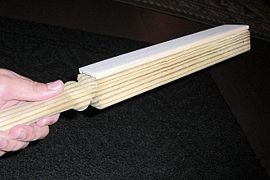
This literally requires 6 things. A porch or stair spindle from Home Depot ($2), a piece of Balsa from a craft store ($3), something to make one small 2" straight cut, a utility knife, glue, and some sand paper. I saw the spindle at Home Depot and noticed that if cut in half it would make a great base for the paddle and had a nice looking handle built right in! I simply cut the spindle in half, cut some balsa to fit the end, glued it on and sanded it to lap it flat. Cost about $5 and took about 10 minutes. See results below. The last picture is what the spindle looks like together.
- Making the strop


The Slartibartfast Pasted Strop
Materials needed: Some type of solid backer, i cut a piece of 12x12 tile i had laying around. Balsa: You can find this at most hobby stores. Some kind of glue Clamps or something heavy to set on top once everything is glued down.
- Materials I used:
- I use clamps, a heavy object will work too once you glue to 2 pieces together
- Make a Grid on the balsa so you can lap it flat.
- Use a figure 8 or x-pattern until the marks are gone. You may want to wipe down the balsa with a damp towel afterward.
- Mix the Chromium Oxide powder with some mineral oil
- Much Easier to spread now
- Draw an X pattern and then spread
- What it looks like spread out. Note: this may be a little thick....
- Why I wear gloves when applying CrO
- Mark your pasted strop to avoid confusion later