Difference between revisions of "Building an inexpensive paddle strop quickly"
(→Building the strop) |
(→Building the strop) |
||
| Line 11: | Line 11: | ||
== Building the strop == | == Building the strop == | ||
| − | + | ||
<gallery perrow="2" heights="250px" widths="400px" caption="Mounting the handle"> | <gallery perrow="2" heights="250px" widths="400px" caption="Mounting the handle"> | ||
| − | Image:Building Quick and Inexpensive Paddle Strops - 001.jpg|This is what you get. It isn't fancy but it works so don't laugh. | + | Image:Building Quick and Inexpensive Paddle Strops - 001.jpg|This is what you get. It isn't fancy but it works so don't laugh. My version features a 16-inch long light, wooden paddle and a 1.5-inch by 11-inch leather stropping surface. |
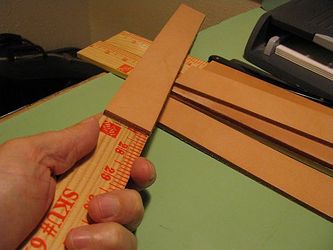
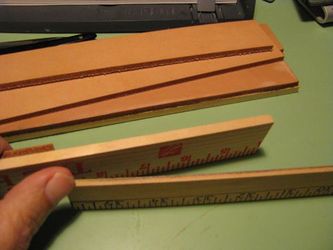
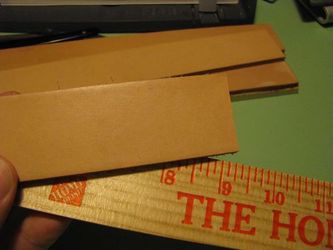
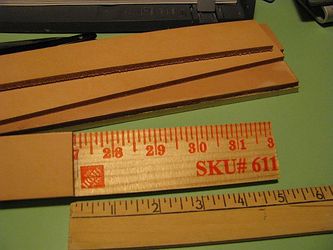
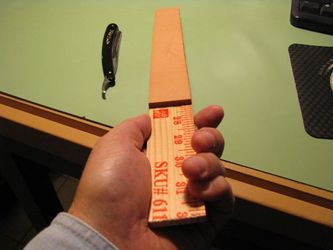
Image:Building Quick and Inexpensive Paddle Strops - 002.jpg|The secret for making this easy is to find leather strips and wood paddle stock that is already at the proper width. Here are some possible material for 1.5-inch wide wood paddle. The top piece is a paint stirring stick available for free at paint shops. The middle piece is a heavy-duty yard stick available for 60 cents each at HomeDepot. THe bottom piece is a poplar trim strip available for about $3. These are all about 1/4 inch thick except the trim strip was a little thicker. | Image:Building Quick and Inexpensive Paddle Strops - 002.jpg|The secret for making this easy is to find leather strips and wood paddle stock that is already at the proper width. Here are some possible material for 1.5-inch wide wood paddle. The top piece is a paint stirring stick available for free at paint shops. The middle piece is a heavy-duty yard stick available for 60 cents each at HomeDepot. THe bottom piece is a poplar trim strip available for about $3. These are all about 1/4 inch thick except the trim strip was a little thicker. | ||
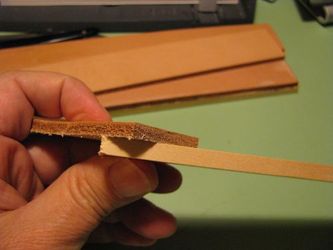
Image:Building Quick and Inexpensive Paddle Strops - 003.jpg|A look at the end grain. Top to bottom is the paint stick, the yard stick, and the poplar trim strip. The yard stick has a nice, tight grain pattern and looks quarter-sawn. Thus, it should be less likely to warp than the other two and give a nice stable surface for mounting the leather. This yard stick is much heavier than typical ones. Also, I sorted through the barrel to find the ones with the best end-grain. | Image:Building Quick and Inexpensive Paddle Strops - 003.jpg|A look at the end grain. Top to bottom is the paint stick, the yard stick, and the poplar trim strip. The yard stick has a nice, tight grain pattern and looks quarter-sawn. Thus, it should be less likely to warp than the other two and give a nice stable surface for mounting the leather. This yard stick is much heavier than typical ones. Also, I sorted through the barrel to find the ones with the best end-grain. | ||
Revision as of 20:58, 19 January 2010
| This article is a stub. You can help the Straight Razor Palace Wiki by expanding it. |
Background
There are several styles of really beautiful paddle strops available at vendor sites, however they tend to be a little expensive. I wanted to experiment with several different stropping pastes, so I decided to make a set of my own paddles based on a very quick and easy design. Mine came out to less than $5 each, and I was able to build them in a day with just a few tools.
Building the strop
- Mounting the handle
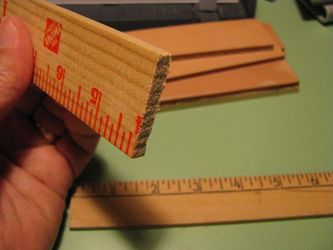
This is what you get. It isn't fancy but it works so don't laugh. My version features a 16-inch long light, wooden paddle and a 1.5-inch by 11-inch leather stropping surface.
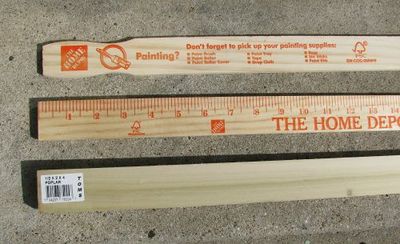
The secret for making this easy is to find leather strips and wood paddle stock that is already at the proper width. Here are some possible material for 1.5-inch wide wood paddle. The top piece is a paint stirring stick available for free at paint shops. The middle piece is a heavy-duty yard stick available for 60 cents each at HomeDepot. THe bottom piece is a poplar trim strip available for about $3. These are all about 1/4 inch thick except the trim strip was a little thicker.
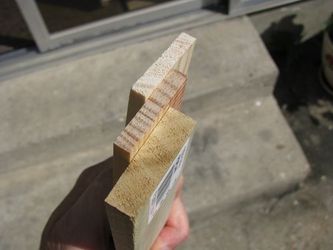
A look at the end grain. Top to bottom is the paint stick, the yard stick, and the poplar trim strip. The yard stick has a nice, tight grain pattern and looks quarter-sawn. Thus, it should be less likely to warp than the other two and give a nice stable surface for mounting the leather. This yard stick is much heavier than typical ones. Also, I sorted through the barrel to find the ones with the best end-grain.
Potential paddle slats
Potential paddle slats
Potential paddle slats
Potential paddle slats

Potential paddle slats
Potential paddle slats
Potential paddle slats


