Difference between revisions of "Hone Lapping 101"
m (Text replacement - "http://straightrazorpalace.com" to "https://straightrazorpalace.com") |
|||
| (30 intermediate revisions by 6 users not shown) | |||
| Line 1: | Line 1: | ||
| − | + | Originally posted by [https://straightrazorpalace.com/members/joshearl.html Josh Earl].<ref>https://straightrazorpalace.com/basic-honing/16043-hone-lapping-101-a.html</ref> | |
| − | Most hones | + | |
| + | Most hones do not come with a flat honing surface. Vintage hones are usually worn from use; new hones aren't flat because of the manufacturing process. Before you use any hone for the first time, it is a good idea to flatten it. This is called lapping the hone. | ||
You can do this with minimal investment. I lapped my hones for a long time with just a piece of wet-dry sandpaper and a flat surface to stick it to. | You can do this with minimal investment. I lapped my hones for a long time with just a piece of wet-dry sandpaper and a flat surface to stick it to. | ||
| − | For this tutorial, I | + | For this tutorial, I will be lapping a Belgian yellow coticule. This is one of my main workhorse hones, and it has not been lapped in a while. I do not have a Norton 4K/8K combo hone, but the procedure is pretty similar with all hones. |
== Getting started == | == Getting started == | ||
| − | To start out, I have collected a pencil, some 320-grit wet-dry sandpaper, a glass of water, and my hone. We're going to use a smooth | + | To start out, I have collected a pencil, some 320-grit wet-dry sandpaper, a glass of water, and my hone. We're going to use a smooth counter top as the lapping surface. |
| − | |||
It's important to get good quality sandpaper. Norton and 3M are good brands. Cheap sandpaper could leave particles embedded in your hone. | It's important to get good quality sandpaper. Norton and 3M are good brands. Cheap sandpaper could leave particles embedded in your hone. | ||
| Line 15: | Line 15: | ||
If you have a Norton hone or other waterstone that requires soaking, place it in a bucket of water for 15 minutes before you start lapping it. | If you have a Norton hone or other waterstone that requires soaking, place it in a bucket of water for 15 minutes before you start lapping it. | ||
| − | + | == Preparing Your Surface == | |
| − | <gallery caption="" widths=" | + | <gallery caption="" widths="250px" heights="160px" perrow="3"> |
Image:Hone_lapping_101DSC_2451.jpg | My coticule doesn't require soaking, so we'll just get started. | Image:Hone_lapping_101DSC_2451.jpg | My coticule doesn't require soaking, so we'll just get started. | ||
Image:Hone_lapping_101DSC_2457.jpg | Pour some water onto the countertop, then place the sandpaper on top of the puddle. This will create a suction that'll hold the sandpaper in place while you work. The smoother the surface, the better. | Image:Hone_lapping_101DSC_2457.jpg | Pour some water onto the countertop, then place the sandpaper on top of the puddle. This will create a suction that'll hold the sandpaper in place while you work. The smoother the surface, the better. | ||
| − | Image:Hone_lapping_101DSC_2458.jpg | | + | Image:Hone_lapping_101DSC_2458.jpg | Place the sandpaper down on the water. |
Image:Hone_lapping_101DSC_2459.jpg | When you have the sandpaper down, pour more water on top of the sandpaper. | Image:Hone_lapping_101DSC_2459.jpg | When you have the sandpaper down, pour more water on top of the sandpaper. | ||
| − | Image:Hone_lapping_101DSC_2475.jpg |If you don't have a countertop that will work, you can get a piece of granite or marble tile at Home Depot or Lowes for about $5. | + | Image:Hone_lapping_101DSC_2475.jpg | If you don't have a countertop that will work, you can get a piece of granite or marble tile at Home Depot or Lowes for about $5. |
| − | Image:Hone_lapping_101DSC_2454.jpg |The next step helps you figure out when the hone is flat. Take the pencil and draw a grid on the surface of the hone. | + | </gallery> |
| − | Image:Hone_lapping_101DSC_2456.jpg | | + | == Begin Flattening == |
| − | Image:Hone_lapping_101DSC_2470.jpg |Place the hone face down on the sandpaper and start swirling it around. Don't use a lot of pressure--just lay your hand on top and move the hone. Some guys like to do figure 8 patterns on the paper. I usually just do small circles. You can try both and see which you like better. | + | <gallery caption="" widths="250px" heights="160px" perrow="3"> |
| + | Image:Hone_lapping_101DSC_2454.jpg | The next step helps you figure out when the hone is flat. Take the pencil and draw a grid on the surface of the hone. | ||
| + | Image:Hone_lapping_101DSC_2456.jpg | This is an example of the grid pattern. | ||
| + | Image:Hone_lapping_101DSC_2470.jpg | Place the hone face down on the sandpaper and start swirling it around. Don't use a lot of pressure--just lay your hand on top and move the hone. Some guys like to do figure 8 patterns on the paper. I usually just do small circles. You can try both and see which you like better. | ||
Image:Hone_lapping_101DSC_2466.jpg | Check the pencil grid on the surface frequently to see how you're progressing. On a new or badly worn vintage hone, it might take 10 or 15 minutes or more to get it completely flat. If you have an old barber hone, it could take several hours. | Image:Hone_lapping_101DSC_2466.jpg | Check the pencil grid on the surface frequently to see how you're progressing. On a new or badly worn vintage hone, it might take 10 or 15 minutes or more to get it completely flat. If you have an old barber hone, it could take several hours. | ||
Image:Hone_lapping_101DSC_2467.jpg | You can see the slurry start to build up in the water. My coticule wasn't too far from flat. It only took about 20 or 30 circles to get all the pencil marks to disappear. | Image:Hone_lapping_101DSC_2467.jpg | You can see the slurry start to build up in the water. My coticule wasn't too far from flat. It only took about 20 or 30 circles to get all the pencil marks to disappear. | ||
| − | Image:Hone_lapping_101DSC_2464.jpg | | + | Image:Hone_lapping_101DSC_2464.jpg | When the pencil marks are all gone, it's a good idea to draw another grid and repeat the lapping process. Sometimes the slurry from the hone can erase the marks before the surface is completely flat. |
| − | + | Image:Hone_lapping_101DSC_2473.jpg | Once the hone is flat, I use the sandpaper to round the corners of the hone until they feel smooth. Sharp corners on the hone can catch the edge of your razor and dull it. | |
| + | </gallery> | ||
| + | == Diamond Plates; An Alternative to Sandpaper == | ||
| + | Often, questions concerning diamond plates are asked in the forum. Diamond plates can be used to lap, refresh stones and even hone razors. Knowing what type of diamond plate best suits your situation, can not only be helpful, but save you some money by choosing the right plate for your needs. The thread linked to, helps to give us an idea of how the different types of diamond plates can be used. [https://straightrazorpalace.com/hones/122237-history-justification-my-diamond-plates.html A History And Justification For My Diamond Plates] <gallery caption="" widths="250px" heights="160px" perrow="3"> | ||
| + | Image:Hone_lapping_101DSC_2478.jpg | A less messy alternative to sandpaper is using another stone to flatten your hone. I like the DMT line of diamond hones. The 325 grit does a great job of flattening softer hones like waterstones and coticules, and you can use it to hone knives and stuff around the house. | ||
| + | Image:Hone_lapping_101DSC_2477.jpg | I also have a 120-grit monster that I use for barber hones. This one is pretty expensive, and it's not good for much else. <po> Norton makes a flattening stone that works well for softer hones. | ||
| + | Image:Hone_lapping_101DSC_2479.jpg | To use my DMT hones for flattening, I usually hold the DMT in my left hand and the hone in my right. I make circles with the hones under a stream of running water in the sink. | ||
| + | Image:Hone_lapping_101DSC_2482.jpg | If I have a lot of lapping to do, I might set the DMT down in the bottom of the sink. <p> You don't need a lot of pressure for this. Just keep the hones making good contact and let the lapping stone do its thing. | ||
</gallery> | </gallery> | ||
| + | == References == | ||
| + | <references/> | ||
| − | + | [[Category:Hones]] | |
| − | |||
| − | |||
| − | |||
| − | |||
| − | |||
| − | |||
| − | |||
| − | |||
| − | |||
| − | |||
| − | |||
| − | |||
| − | |||
| − | |||
| − | |||
| − | |||
| − | |||
| − | |||
| − | |||
| − | |||
| − | |||
| − | |||
| − | |||
| − | |||
| − | |||
| − | |||
| − | |||
| − | |||
Latest revision as of 10:36, 17 February 2018
Originally posted by Josh Earl.[1]
Most hones do not come with a flat honing surface. Vintage hones are usually worn from use; new hones aren't flat because of the manufacturing process. Before you use any hone for the first time, it is a good idea to flatten it. This is called lapping the hone.
You can do this with minimal investment. I lapped my hones for a long time with just a piece of wet-dry sandpaper and a flat surface to stick it to.
For this tutorial, I will be lapping a Belgian yellow coticule. This is one of my main workhorse hones, and it has not been lapped in a while. I do not have a Norton 4K/8K combo hone, but the procedure is pretty similar with all hones.
Contents
Getting started[edit | edit source]
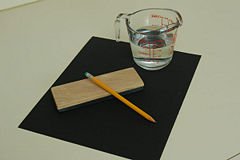
To start out, I have collected a pencil, some 320-grit wet-dry sandpaper, a glass of water, and my hone. We're going to use a smooth counter top as the lapping surface.
It's important to get good quality sandpaper. Norton and 3M are good brands. Cheap sandpaper could leave particles embedded in your hone.
The first time you lap your hone, I'd suggest starting with sandpaper in the 320 to 400-grit range. This coarse paper will flatten the hone quickly. If you'd like, you can experiment with finishing the honing surface with paper between 600 and 1000 grit. Some guys find that the higher grit papers leave a smoother honing surface.
If you have a Norton hone or other waterstone that requires soaking, place it in a bucket of water for 15 minutes before you start lapping it.
Preparing Your Surface[edit | edit source]
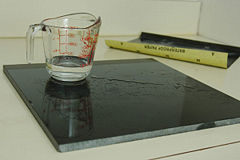
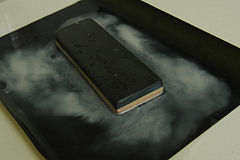
My coticule doesn't require soaking, so we'll just get started.
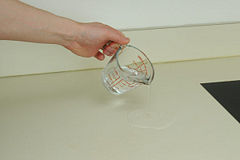
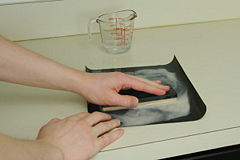
Pour some water onto the countertop, then place the sandpaper on top of the puddle. This will create a suction that'll hold the sandpaper in place while you work. The smoother the surface, the better.
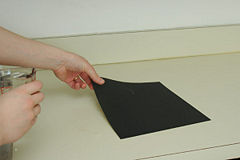
Place the sandpaper down on the water.
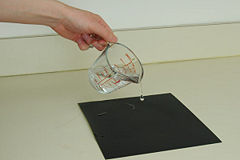
When you have the sandpaper down, pour more water on top of the sandpaper.
If you don't have a countertop that will work, you can get a piece of granite or marble tile at Home Depot or Lowes for about $5.


Begin Flattening[edit | edit source]

The next step helps you figure out when the hone is flat. Take the pencil and draw a grid on the surface of the hone.
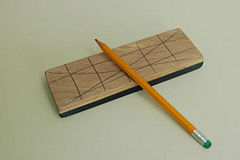
This is an example of the grid pattern.
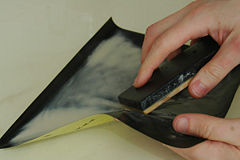
Place the hone face down on the sandpaper and start swirling it around. Don't use a lot of pressure--just lay your hand on top and move the hone. Some guys like to do figure 8 patterns on the paper. I usually just do small circles. You can try both and see which you like better.

Check the pencil grid on the surface frequently to see how you're progressing. On a new or badly worn vintage hone, it might take 10 or 15 minutes or more to get it completely flat. If you have an old barber hone, it could take several hours.
You can see the slurry start to build up in the water. My coticule wasn't too far from flat. It only took about 20 or 30 circles to get all the pencil marks to disappear.
When the pencil marks are all gone, it's a good idea to draw another grid and repeat the lapping process. Sometimes the slurry from the hone can erase the marks before the surface is completely flat.
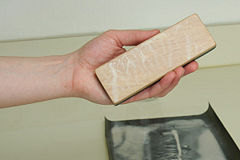
Once the hone is flat, I use the sandpaper to round the corners of the hone until they feel smooth. Sharp corners on the hone can catch the edge of your razor and dull it.


Diamond Plates; An Alternative to Sandpaper[edit | edit source]
Often, questions concerning diamond plates are asked in the forum. Diamond plates can be used to lap, refresh stones and even hone razors. Knowing what type of diamond plate best suits your situation, can not only be helpful, but save you some money by choosing the right plate for your needs. The thread linked to, helps to give us an idea of how the different types of diamond plates can be used. A History And Justification For My Diamond Plates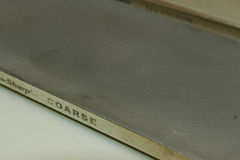
A less messy alternative to sandpaper is using another stone to flatten your hone. I like the DMT line of diamond hones. The 325 grit does a great job of flattening softer hones like waterstones and coticules, and you can use it to hone knives and stuff around the house.
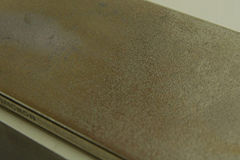
I also have a 120-grit monster that I use for barber hones. This one is pretty expensive, and it's not good for much else. <po> Norton makes a flattening stone that works well for softer hones.
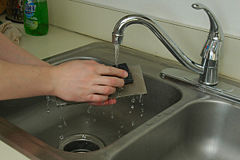
To use my DMT hones for flattening, I usually hold the DMT in my left hand and the hone in my right. I make circles with the hones under a stream of running water in the sink.
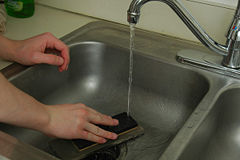 If I have a lot of lapping to do, I might set the DMT down in the bottom of the sink.
You don't need a lot of pressure for this. Just keep the hones making good contact and let the lapping stone do its thing.


