Difference between revisions of "Honing a damaged blade"
m (Added Illustrated guide to fixing a damaged blade - first draft) |
m (Fixed some stuff.) |
||
| Line 1: | Line 1: | ||
Keep in mind before reading, that this is not the only way to skin this cat, but it is the most consistent way I have found…. This is called the "Progressive Honing Method". The [[Norton_Pyramid_Honing_Guide | Norton Pyramid Honing]] method also works well, after the initial [[Bevel-setting in theory and practice|bevel is formed]]… | Keep in mind before reading, that this is not the only way to skin this cat, but it is the most consistent way I have found…. This is called the "Progressive Honing Method". The [[Norton_Pyramid_Honing_Guide | Norton Pyramid Honing]] method also works well, after the initial [[Bevel-setting in theory and practice|bevel is formed]]… | ||
| + | |||
| + | == Tools needed == | ||
* Stones needed: ANY BRANDS….. | * Stones needed: ANY BRANDS….. | ||
| Line 8: | Line 10: | ||
** A low grit stone 220-600 grit | ** A low grit stone 220-600 grit | ||
** A high grit finisher above 10k | ** A high grit finisher above 10k | ||
| + | |||
| + | == Step by step guide to honing a damaged blade == | ||
First let us take on a straight edge razor, with damage, a frown, or uneven wear. | First let us take on a straight edge razor, with damage, a frown, or uneven wear. | ||
| Line 25: | Line 29: | ||
Move to your 1k stone and [[Bevel-setting in theory and practice|establish a true bevel]]. This will go much faster and be way more even since you started the work on the low grit cutter. | Move to your 1k stone and [[Bevel-setting in theory and practice|establish a true bevel]]. This will go much faster and be way more even since you started the work on the low grit cutter. | ||
| − | Again I use a 10 lap set with the 3 straight and 2 X strokes mix then spin the stone and repeat until that edge is nice, even, and sharp. At this point the edge is passing the TNT the TPT, and it will pop arm hairs at the base of the hair with just a touch. | + | Again I use a 10 lap set with the 3 straight and 2 X strokes mix then spin the stone and repeat until that edge is nice, even, and sharp. At this point the edge is passing the [Sharpness_tests_explained#TNT_-_Thumb_Nail_Test|TNT] the TPT, and it will pop arm hairs at the base of the hair with just a touch. |
For stubborn spots that just don’t want to come into line, using circular or Japanese style honing methods will normally do that for you. Just remember to follow that with a 10 lap smoothing set… | For stubborn spots that just don’t want to come into line, using circular or Japanese style honing methods will normally do that for you. Just remember to follow that with a 10 lap smoothing set… | ||
| Line 43: | Line 47: | ||
Like I said at the beginning there are other ways to get there, but I have worked on this method now for awhile now and it seems very consistent. | Like I said at the beginning there are other ways to get there, but I have worked on this method now for awhile now and it seems very consistent. | ||
| − | For | + | For smilies this needs modification on the bread knife method and the type of stroke used on the hones. |
| + | |||
== Don't Despair == | == Don't Despair == | ||
We'd also like to remind the those of you just starting to play with eBay razors that patience is critical. It can take a surprising amount of time to bring one of these back to shaving sharp - it really makes you appreciate just how hard this steel is and how terribly slow these hones really are. One of the advantages that experience gives you is appreciation of this fact so you don't get frustrated when you run into problems. It also builds your confidence so you know that you can actually do it with enough time and careful attention. Then it becomes less of a problem and more of a puzzle, and puzzles are a lot more fun to solve.<ref name="reminder">[http://www.straightrazorplace.com/forums/87151-post16.html A Reminder] It takes patience</ref> | We'd also like to remind the those of you just starting to play with eBay razors that patience is critical. It can take a surprising amount of time to bring one of these back to shaving sharp - it really makes you appreciate just how hard this steel is and how terribly slow these hones really are. One of the advantages that experience gives you is appreciation of this fact so you don't get frustrated when you run into problems. It also builds your confidence so you know that you can actually do it with enough time and careful attention. Then it becomes less of a problem and more of a puzzle, and puzzles are a lot more fun to solve.<ref name="reminder">[http://www.straightrazorplace.com/forums/87151-post16.html A Reminder] It takes patience</ref> | ||
| Line 50: | Line 55: | ||
<gallery caption="Saving a Friodur" widths="350px" heights="300px" perrow="2"> | <gallery caption="Saving a Friodur" widths="350px" heights="300px" perrow="2"> | ||
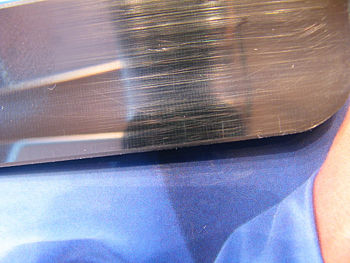
| − | Image:Friodur edge repair before and after pics - friodur002.jpg | | + | Image:Friodur edge repair before and after pics - friodur002.jpg |So the plan was to breadknife her edge flat again. [http://www.straightrazorplace.com/forums/members/mkevenson.html mkevenson] used his Norton flattening stone back after lapping with 320 grit wet dry paper. |
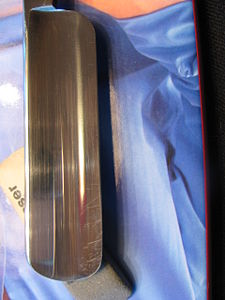
| − | Image:Friodur edge repair before and after pics - friodur007.jpg | | + | Image:Friodur edge repair before and after pics - friodur007.jpg |Here is what she looked like after the Norton. |
| − | Image:Friodur edge repair before and after pics - friodurrestoduringandafter12kdmt004.jpg | | + | Image:Friodur edge repair before and after pics - friodurrestoduringandafter12kdmt004.jpg | That didn't take too long. He next decided to continue breadknifing with his DMT1200. This got her flat. |
| − | Image:Friodur edge repair before and after pics - friodurrestoduringandafter12kdmt005.jpg | | + | Image:Friodur edge repair before and after pics - friodurrestoduringandafter12kdmt005.jpg |After her edge got pretty flat he went to work on the DMT 1200 to set her bevel. Here's how it went: 20 lateral, 20x strokes, 10lat, 10x, 5x20 circular, 10x slight grab at toe on [Sharpness_tests_explained#TNT_-_Thumb_Nail_Test|TNT]. Followed by 10lat, 10x,5x20circ, 20x, 20lat, 10x, some grab at heal and toe on [Sharpness_tests_explained#TNT_-_Thumb_Nail_Test|TNT] none in middle, 20lat, 20x, 20x, 5x20circ, 20x, remove tape, TNT grab 100%. 10x, 10x 20x, less grab mid blade, followed by 20x, 20x, 5x20 circ, 20x, 50x, less grab mid blade on [Sharpness_tests_explained#TNT_-_Thumb_Nail_Test|TNT], 1st arm hair test. 40x, 20x, 20x, 60x, cut some arm hair. [Sharpness_tests_explained#TNT_-_Thumb_Nail_Test|TNT] full grab whole blade. 20x, 50x, 20x, 50x. Done. Cuts arm hair easily. Now on to the Norton 4k/8/ then the Chinese 12k, strop and shave, |
| − | Image:Friodur edge repair before and after pics - friodurrestoduringandafter12kdmt019.jpg | | + | Image:Friodur edge repair before and after pics - friodurrestoduringandafter12kdmt019.jpg | Here is what she looks like after the DMT. |
| − | Image:Friodur edge repair before and after pics - friodurrestoduringandafter12kdmt-1.jpg | | + | Image:Friodur edge repair before and after pics - friodurrestoduringandafter12kdmt-1.jpg | Happy shaving! |
</gallery> | </gallery> | ||
== Acknowledgements == | == Acknowledgements == | ||
Revision as of 14:42, 16 March 2009
Keep in mind before reading, that this is not the only way to skin this cat, but it is the most consistent way I have found…. This is called the "Progressive Honing Method". The Norton Pyramid Honing method also works well, after the initial bevel is formed…
Contents
Tools needed
- Stones needed: ANY BRANDS…..
- A bevel setter approximately 1k
- A sharpening stone approximately 4k
- A polishing stone approximately 8k
- Stones that make life easier or better:
- A low grit stone 220-600 grit
- A high grit finisher above 10k
Step by step guide to honing a damaged blade
First let us take on a straight edge razor, with damage, a frown, or uneven wear.
First the edge needs to be straight. There are a few ways to accomplish this, but the fastest and most accurate way I have found is what is called the bread knife method:
- Take the razor, place it on the lowest grit stone you have, edge straight down on the stone, and try to cut the stone like you would a loaf of bread (I hold the blade itself, dead center) this totally dulls the edge and squares it up taking out nicks, chips, frowns and sometimes heel and toe wear..
- What you end up with is a nice flat straight edge that is absolutely dull…
Now comes the re-set. This is what I have used with the most consistent success.
Use 3 layers of electrical tape on the spine. This concentrates the honing to the edge. Use a low grit stone. I use a 220 Norton here. You are re-cutting the edges of that square bevel off, and it needs to take a lot of metal off fast (any fast cutter would work.) Do angled laps heel first - no X stroke here - across the hone. You might as well get a nice even bevel started right off. I have my own system here. I use 10 lap sets on all my honing. After 10 laps I rinse the stone and spin it so I am using the other edge now and repeat until the edge starts getting sharp.
As soon as you can feel an edge, switch up to make sure of an even bevel. I do 3 of the heel forward straight laps down the hone, then 2 actual X strokes still heel forward, then 3 straight then 2 X stroke laps continuing with the 10 lap sets until I have a sharp edge. It will feel like a very sharp kitchen knife at this point.
Now comes decision time. Remove the 3 layers on tape at this point. I personally use 1 layer of tape until I finish on the stones but that is your decision.
Move to your 1k stone and establish a true bevel. This will go much faster and be way more even since you started the work on the low grit cutter. Again I use a 10 lap set with the 3 straight and 2 X strokes mix then spin the stone and repeat until that edge is nice, even, and sharp. At this point the edge is passing the [Sharpness_tests_explained#TNT_-_Thumb_Nail_Test|TNT] the TPT, and it will pop arm hairs at the base of the hair with just a touch.
For stubborn spots that just don’t want to come into line, using circular or Japanese style honing methods will normally do that for you. Just remember to follow that with a 10 lap smoothing set…
Again where you go from here is your choice as you now have an established bevel. For me I go to a 2k Shapton to finish the bevel setup and to align the edge to the Shapton stones. It doesn't take many 10 lap sets now to refine the edge, and all laps are done using a smoothing X pattern. Taking this refined bevel, I head to a 4k Shapton and sharpen the edge again using 10 lap sets with the X pattern. At this time the edge will pop arm hairs above the skin level with out a problem…
Then I move to the 8k Shapton and polish the edge into shaving sharp levels…
From here where you go is only personal preference, but I take it to the 16k Shapton and get it really smooth.
I don’t touch the edge at all above the 4k level except on arm hair and then very little. There should be no need for it. You should now have a shaving sharp edge that you would take to the “user appropriate” strops - again, a personal preference here.
Like I said at the beginning there are other ways to get there, but I have worked on this method now for awhile now and it seems very consistent.
For smilies this needs modification on the bread knife method and the type of stroke used on the hones.
Don't Despair
We'd also like to remind the those of you just starting to play with eBay razors that patience is critical. It can take a surprising amount of time to bring one of these back to shaving sharp - it really makes you appreciate just how hard this steel is and how terribly slow these hones really are. One of the advantages that experience gives you is appreciation of this fact so you don't get frustrated when you run into problems. It also builds your confidence so you know that you can actually do it with enough time and careful attention. Then it becomes less of a problem and more of a puzzle, and puzzles are a lot more fun to solve.[1]
Illustrated guide to fixing a damaged blade
- Saving a Friodur
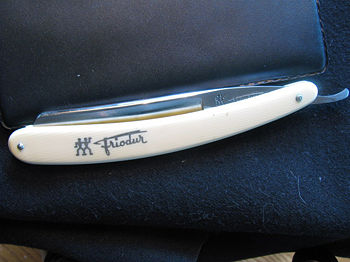
So the plan was to breadknife her edge flat again. mkevenson used his Norton flattening stone back after lapping with 320 grit wet dry paper.
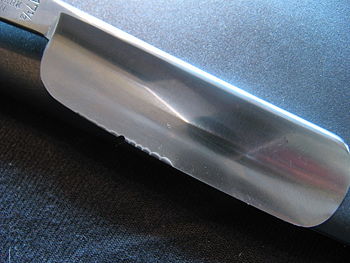
Here is what she looked like after the Norton.
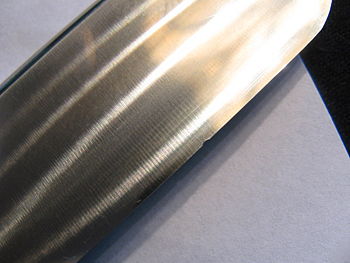
That didn't take too long. He next decided to continue breadknifing with his DMT1200. This got her flat.
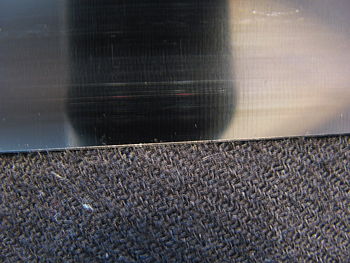
TNT] full grab whole blade. 20x, 50x, 20x, 50x. Done. Cuts arm hair easily. Now on to the Norton 4k/8/ then the Chinese 12k, strop and shave,
Here is what she looks like after the DMT.
Happy shaving!


