Photographing Razors
Some of you, especially those restoring their blades, want to document their kit or the process of its restoration. Razors, however, are rather difficult to photograph well. We have collected a few tips on photographing razors, because "shiny stuff stinks to photo"[1]
Background
The thing that makes razors so difficult is that the blades are shiny. Shiny stuff stinks to photo. If you have the time and means to build a light tent like the one in this article, it will greatly help.The bottom line is take a ton of photos and vary how you have the razor positioned.
Some other tips
- Lower f-stops will give you a shallow depth of field. If you are shooting the whole razor and it is perpendicular to the lens, a low f-stop is fine (f1-f2.7). If the blade is not perpendicular (think: shooting the end to show the grind) a low f-stop will result in some parts of the razor being in focus and some parts out of focus.
- ISO setting should be as low as it can be to prevent digital noise. Sometimes, you can't shoot lower than 1600. It happens, but in your case, add more light.
- Backing up and Zooming into the subject (optical zoom only! Digital zoom is just degrading the picture!) is very effective in helping to produce a good shot with a point and shoot camera. Macro settings are only useful if you are shooting close. Most macro settings will not allow you to frame an entire razor and have it in focus. If you are shooting a part of the razor (just the tang or the stamping) Macro will be your friend. Bottom line, there is no magic f-stop, iso, shutter speed setting combo, it depends on what you are trying to accomplish. No matter what, you will do better if you have a:
- Tripod. If you don't have one, unscrew the shade from a lamp and use the lamp, a lot of times they have the same size threads on the harp. Alternatively, you can use a bolt that will fit (1/4" usually but you'll have to figure out what thread pitch) and a cord tied to it that you can then stand on. Pulling against the cord creates stabilizing tension. The more cords and directions of the cords, the more stability. Use atleast two, one for each foot. Bottom line is: you can always find a way to stabilize your camera.[2]
- If your camera allows it, learn about setting the white balance. You will need a set of white balance cards to do this.[3]
- Some examples
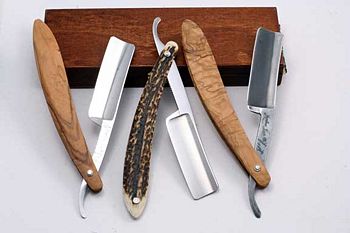
Some Livis in the light box. Note I kept them perpendicular to the lens so as not to make them look shorter.
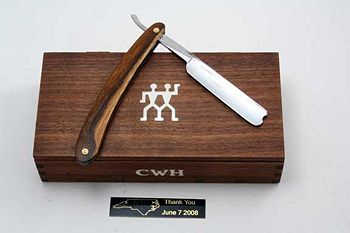
Coming off of perpendicular here was okay because the box gives perspective scale.

